RC Guides Forums
Would you like to react to this message? Create an account in a few clicks or log in to continue.


A place for all things Radio Controlled
 
HomeLatest imagesSearchRegisterLog in
Come sign up on the new forum ----- www.myrcguide.com


 Exceed RC - Blazing Star

Go down 
+3
bighills
mwf1227
Nuttcaze
7 posters
AuthorMessage
Nuttcaze
Admin
Nuttcaze


Exceed RC - Blazing Star Empty
PostSubject: Exceed RC - Blazing Star   Exceed RC - Blazing Star I_icon_minitimeSat Mar 07, 2009 11:45 am

Finally Figured out what those plastic pieces were lol!

Exceed RC - Blazing Star BStailfins2Large

Exceed RC - Blazing Star BStailfinsLarge


Last edited by Nuttcaze on Tue Sep 15, 2009 12:57 pm; edited 3 times in total
Back to top Go down
Nuttcaze
Admin
Nuttcaze


Exceed RC - Blazing Star Empty
PostSubject: Re: Exceed RC - Blazing Star   Exceed RC - Blazing Star I_icon_minitimeSat Mar 07, 2009 11:45 am

-------------My newest guide

Blazing Star Beginners Guide

Exceed RC - Blazing Star Blazingstar

http://www.xheli.com/exceed-rc-blazing-star-4-channel-co-axle-helicopter.html

Specifications:

- Main Rotor Diameter (Upper/Lower): 18"
- Overall Length: 17.3"
- All-up Weight: 355g (with battery)
- Drive System: 2x 370SH Carbon Brush Motor
- Servo: 2x 8.5g Servos
- Battery: 7.4V 1250mAh Li-polymer
- Charger: Exceed-RC GA-003 Lithium battery Charger
- Control System: 4 CH FM Multifunctional Transmitter and 3-in-1 Receiver (RX-406)

Note - There are 2 different versions of the receivers for this heli, they have slightly different settings for each version. I will update the info soon.

[size=14pt]For those having problems with their top rotors stopping spinning, watch this video.[/size]


Dave Herberts review of the Blazing Star
(He's one of my teachers smiley-happy088 )


My Video Beginners Guide

Part 1 - Basic Info


Part 2 - Set Up


Part 3 - Flight Tips


Part 4 - Dismantling the Blazing Star (1of2)


Part 5 - Dismantling the Blazing Star (2of2)


Flying my Blazing Star at work


[size=14pt]Flying my Blazing Star[/size]


[size=14pt]Testing some Blazing Star Rx's[/size]


-------------------------------------


Last edited by Nuttcaze on Fri Mar 13, 2009 8:33 am; edited 2 times in total
Back to top Go down
Nuttcaze
Admin
Nuttcaze


Exceed RC - Blazing Star Empty
PostSubject: Re: Exceed RC - Blazing Star   Exceed RC - Blazing Star I_icon_minitimeSat Mar 07, 2009 11:45 am

--------------------------------------------------

Original Author (from rcdiscuss) - coffinsnail

Blazing Star is the same as the Walker 53-1.

Edit's
Added a Mods/Upgarde Section 3rd Reply 10-1-08
Added Repair for Battery/Landing skid mount holes 9-7-08
Added Flight Specifics Training, and Links 2nd Reply 9-6-08
Moved Repairs Section to 1st Reply 9-6-08
Added How to replace Main Gears (w/pics) and other changes 9-6-08

Note i will delete edit info if more then 5 days old, if i have more then 3 listed to keep the list short.


Exceed RC - Blazing Star Box9hx8.thExceed RC - Blazing Star Z553-124G0104_less

For those who are new take note on these things i had to learn.

Recomended Spare Parts

1. Blades, blades, blades http://www.xheli.com/50h12-01.html
2. Tail Truss http://www.xheli.com/50h12-05.html
3. Flybar http://www.xheli.com/50h12-02.html
4. Gear Set http://www.xheli.com/50h12-15.html
5. Landing Gear http://www.xheli.com/50h12-07.html
5a. Screw Set http://www.xheli.com/50h12-22.html

Link to Complete Parts Page: http://www.xheli.com/sparepart50h12.html

Note: Screw Set includes Ball Linkage (minus Balls) so ordering a screw set in my opionion is well worth the price and recomended.
Exceed RC - Blazing Star Screwsetnv9

NOTE: Personal recomendation based off my experiance is this. If you do not order a second heli for parts get these parts to start with. 1 (2 sets recomended) set of blades ($13), 1 screw set ($9), and 1 Main gear set ($9) Total: $31

LiPo Battery Warning

These battery's are very sensitive to any damage, they are also what i would concider unstable from what i have been told. Not completly but enough to take caution. These batterys have been known to ignite into flames from over charge, damage, or just spontaniously while not plugged into anything. So it is very important to store them in a non burnable container, maybe a flower pot, or spend the money and get the bag recomended for them from xheli. http://www.xheli.com/lipo-safe-bag.html


Blades

There are no harder blades for the Heli, use Plasti Dip Aerosal to strengthen them, can be purchased at Home Depot, or on . But remember if you strengthen them, you then take a higher chance and breaking other parts and maybe burning out a motor. So use with caution.

When replacing your blades here are some tips i learned my first time.

1. Have a big area to work on, put down a nice towel incase you drop a screw it wont roll off same goes for the nuts.
2. Get a flat fridge magnet, you dont want anything to strong, but use it to lay the screws and nuts on makes keeping them handy easy and does not magnetise them.
3. Most important, before you put the blades on run a screw thru each new blade to make them easier as the holes are kind of tight on new blades, much easier to insure the hole is good with the blade near the table incase you drop a screw. You dont want to drop one while putting it on, you might lose it.

Trimming the Heli

The Sensitivity Dial and Extent Dial are located under your canopy. Take note if you need to adjust them, Sensitivity should be set to 10 oclock, and Extent to 6 oclock to start with. Then if your Heli spins right turn the sensitivity to the left 1/4 turn and reset your trim tab to center. (the receiver is refered to by people as the 4 in 1)

Andy has said the Sensitivity should be full left, and evade full left and back 1/4 turn.

If your Sesitivity is all the way to one side, and you have to hold the stick full to the same side then the rear motor might be going out. Example: set the screw to the left, to compensate for right spin, and hold stick to left after full trim.

Radio Faq's

Q. What are the two toggle switches on the top of the Remote used for?
A. They are used for nothing they are dissconnected. (my personal belief is the radio design was to be used with multiple models to cut down on cost of production thus cheaper to mount them then to remove them)

Q.What postion should the Dip Switches be set to on the back of the remote transmitter?
A. Dip Switch 1 is off, Dip Switch 2,3,4 are on, Dip Switch 5,6,7,8 are off (Note: This is not for a 2.4ghz radio)

Tools

Make sure you have a screw driver and either wrench or nut driver to fit your Heli. The nuts on the blade (im not sure exactly) but i use a 4mm long socket to change my blades. long socket keeps me from having to use a rachet.

I bought a small screwdriver and hex driver set at home deopot for 5 bucks each.

Tip: if your screw driver is not magnetised, get any magnet stronger the better, and rub it along the tip of the screw driver. This will magnetise it and make taking small screws out without losing them much easier.

Exceed RC - Blazing Star 1d5a5845-a098-40be-bfb8-0fc51f83dbe0_3Exceed RC - Blazing Star 23b010eb-b462-48ff-b7d5-240fc5ee8034_3

Also nice to have a container for holding extra screws. I use a Coolmints Box, because it has a nice lip on the inside to keep me from dumping them out. Its short on the sides to prevent dumping. And well its just the right size with a hole big enough to reach into or get a magnitised screw driver in to pick up what i want.
Exceed RC - Blazing Star Containerbn1

After a Crash

Be sure to inspect the whole Heli, including the battery due to warning at the top. Turn your rotors by hand easily and check the gears all the way around to insure one tooth is not sheared off. If it is this will surely strip out quickly as the gears are plastic, one of those make it weak to save the motor things. Anyways check all over for crack and small breaks. I would even recomend removing the canopy on a hard crash where a blade is broken to insure the motors didnt take any damage that may have upset them. This also makes it easier to check the Main shaft at least in my opinion as i use a straight edge to lay along it to insure its straight.

General Tip

If you are new, you might want to concider buying 2 of the same heli for the spare parts to begin with. I have recently ordered extra blades and screws and linkages and they have added up to almost half the cost. So if i burn out a motor i will end up spending near the full cost of a heli in just parts. I am planning to purchase a second for parts, especially since the tail broke on mine and they are out of stock at the time of posting this. I figure if i only use the second for parts, and i can rebuild it once i move up to a newer type of heli, for half the cost of a new one, i can always sell it or give it as a gift to a friend.

If possible i recomend ordering 2 sets of blades, and 1 tail rotor they are made of plastic and break easily.

You can glue blades and the tail back together sometimes and get away with it, but since they are weak you might want new ones on hand.

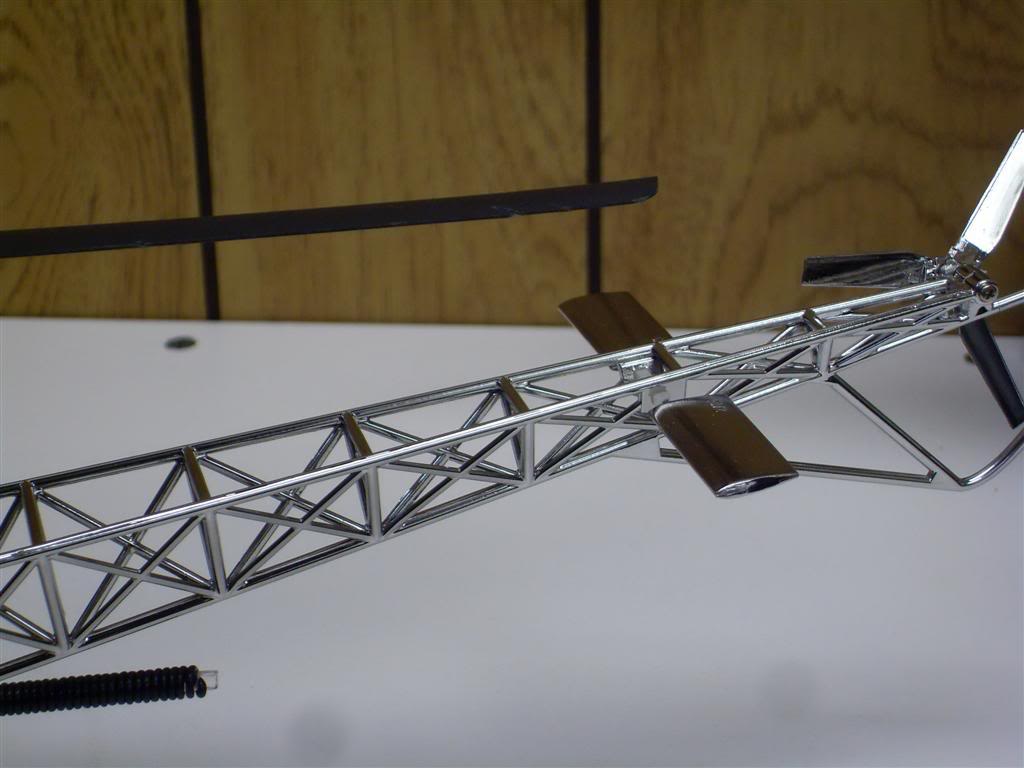
I will post a picture soon of the repair i did to my tail section, i ended up adding a bit of weight to my heli but i needed the strength on the tail because of where it snapped off. I used a coke bottle for two sides of the tail to give me more glue surface when repairing. Image to come soon.

Links for the Walkera HM 53#1 which is the same but diffrent canopy and is 2.4ghz

Manual Link: http://www.walkera.com/en1/fileDown.jsp?file=%2Fcn%2Fupload%2Fexplain%2FZ553-124G0104_expe.pdf&la=en

Exploded View: http://www.walkera.com/en1/fileDown.jsp?file=%2Fcn%2Fupload%2Fpicture%2FZ553-124G0104_ex.jpg&la=en

Links To Heli Related Stuff

Beginners Lesson in Helicopter Flight and Explanations
http://www.helifever.com/articles/26/1/Lesson-1-Helicopter-Flight

3d Manuvers with Drawings and Explanations
http://www.rchelicopter.co.uk/moves.htm#

Large Page of R/C Related Links
http://www.weflyrc.org/links.htm

R/C Heli Begginers PDF Guide 240 Pages Long
http://site.xheli.com/heliguide.pdf
Alt Download:http://www.swashplate.co.uk/ehbg/ehbg-17.pdf

Thanks to for guiding me as it was their input that created this thread.

canwalker, raygun, rtfheli, and others for general input. My apologies if i have missed thanking you.

also if you want to add to this thread i will update this top post to reflect any tips and info which might be needed to help guide new flyers like me.


[/quote]


Last edited by Nuttcaze on Fri Mar 13, 2009 8:29 am; edited 3 times in total
Back to top Go down
Nuttcaze
Admin
Nuttcaze


Exceed RC - Blazing Star Empty
PostSubject: Re: Exceed RC - Blazing Star   Exceed RC - Blazing Star I_icon_minitimeSat Mar 07, 2009 11:45 am

------------------------------------------------

Original Author (from rcdiscuss) coffinsnail


Repairs Section

Battery/Landing Skids Mount Repair

Ok i had a hard enough landing the other day to make the battery rip the screws clean out of my heli. Due to the heli being plastic where the landing gear and battery tray mount. If you strip it out it will be hard to not pop the tray loose when you land roughly. So two ways to fix this are as such.
1. Prefered Method - Use some Thread Lock, low grade, on the screw to help take up the room when you screw it in.
1a. Secondary method - Use cement, not super glue, put a drop in the hole then put your screw in but do not tighten fully. Wait for the glue to setup a little then finish screwing it in. The reason for this is to give your screw something to screw into, as well as if you need to remove them later the glue will tear as you remove the screw.

2. Make shift Method - I had to do this as i was missing both of the above. This fix is defenitly a temp fix, but does work. Use some model clay, air dry, roll the screw into the clay and get it into the threads then make sure there is a tiny bit extra on the screw when you screw it in. what will happen is the clay will bind the screw as you push it in, but if you have to remove it, it will flake off.

(images to come later)

Heli keeps flying backward after adjusted fully

If your Heli keeps drifting forward and you have trimed it out fully, you can do this. Take some Modeling clay, and stick it inside the very front of the nose cone to weight it some. Add small amounts untill you find just the right amount for having your trim centered or within a few clicks of center. This way you will have some trim if needed later.

(images to come soon)

Tail Rotor Repair

I used a coke bottle to make the repair on my tail rotor. Take note however this repair makes the tail very strong. Yet i desided it was ok since i still have a crack farther back i did not repair to insure one weak spot on my tail incase i hit something. I took a bottle cut it to match where i wanted to glue it, and made two pieces one for each side. The nice part besides the strength i gained was the fact its clear and from a distance you can not see its even on there. Note: with this fix i have added weight to the tail, so counter it by shifting the battery box forward, or adding a bit of clay inside the nose cone.

Exceed RC - Blazing Star Tailrepairij5

Changing Main Gears

Step One: Remove Landing Gear and Battery Cage

Step Two: Remove side panel
Exceed RC - Blazing Star Sidepanelfl5 Exceed RC - Blazing Star Sideviewnz0

Step Three: Remove Gears

Step Four: Remove Bering From Upper Gear
Tip Take a small screw driver or something tappered that will at some point not slide completely thru the bering Press slowly and with even pressure. If you feel the tool your using might get stuck back off and find something better. Once the Bering is out, replace it into the new Gear. I personally mounted the gear first to give me more surface to hold, as well as to not damage the gear. Press it untill you feel it slip in fully do not press to hard, you may cause damage to the bering. Once the bering is seated in push your upper blade thru and insure it spins well.
Exceed RC - Blazing Star Berringremovallm2 Exceed RC - Blazing Star Berringinstallmq7

Step Five: Place lower gear on. NOTE: The Upper rotor shart has a indent in it, which i missed the first time. You have to be sure this is lined up with the set screw so it will hold tightly or you will end up as i did. With your top rotor flying off the heli LOL.

Step Six: Check motors to insure they are making contact, but not to tight, there should be some space between the gears and motor for backlashing. If you need to you can loosen the motor screws and move the motor easily to desired location.
Exceed RC - Blazing Star Bottomgeartc9

Final Step: replace all body parts you removed.


Last edited by Nuttcaze on Fri Mar 13, 2009 8:31 am; edited 2 times in total
Back to top Go down
mwf1227

mwf1227


Exceed RC - Blazing Star Empty
PostSubject: Walkera   Exceed RC - Blazing Star I_icon_minitimeSat Mar 07, 2009 3:21 pm

I just picked up a Walkera 5#10 (I don't know where they come up with their naming convention). It is a real sweet heli. It's a perfect living room heli. It's quiet and so stable that you can watch TV while you're flying it. Once you trim it out you can leave the room and come back to find it right where you left it.
Back to top Go down
Nuttcaze
Admin
Nuttcaze


Exceed RC - Blazing Star Empty
PostSubject: Re: Exceed RC - Blazing Star   Exceed RC - Blazing Star I_icon_minitimeSat Mar 07, 2009 3:27 pm

mwf1227 wrote:
I just picked up a Walkera 5#10 (I don't know where they come up with their naming convention). It is a real sweet heli. It's a perfect living room heli. It's quiet and so stable that you can watch TV while you're flying it. Once you trim it out you can leave the room and come back to find it right where you left it.

At first I wasn't too fond of co-ax's at first but for some indoor fun they are the best
Back to top Go down
Nuttcaze
Admin
Nuttcaze


Exceed RC - Blazing Star Empty
PostSubject: Re: Exceed RC - Blazing Star   Exceed RC - Blazing Star I_icon_minitimeSun Mar 08, 2009 4:11 am

A vid from a while back

Back to top Go down
Nuttcaze
Admin
Nuttcaze


Exceed RC - Blazing Star Empty
PostSubject: Re: Exceed RC - Blazing Star   Exceed RC - Blazing Star I_icon_minitimeTue Mar 10, 2009 9:20 am

updated the info

:needpic:
Back to top Go down
bighills

bighills


Exceed RC - Blazing Star Empty
PostSubject: Re: Exceed RC - Blazing Star   Exceed RC - Blazing Star I_icon_minitimeFri Mar 27, 2009 2:04 pm

Are there different blades I can use on the blazing star?? Also front motor junk after only three weeks of recieving the bird. Is there a better motor to put back in?? Thanks.
Back to top Go down
Nuttcaze
Admin
Nuttcaze


Exceed RC - Blazing Star Empty
PostSubject: Re: Exceed RC - Blazing Star   Exceed RC - Blazing Star I_icon_minitimeSun Mar 29, 2009 2:35 am

Dave herbert said that he was able to use smaller blades, not sure which blades he was talking about, Im gonna try using some blades from a E_Sky Co-Comanche tomorrow, they're quite a bit smaller though.

no ideas about a better replacement motor though, rtf heli made a brushless conversion I think
Back to top Go down
lowbudget


Exceed RC - Blazing Star Empty
PostSubject: BS BLADES - RTF   Exceed RC - Blazing Star I_icon_minitimeSun Mar 29, 2009 3:22 am

I ordered a set of hm5-4q3-02 blades 408mm for my BS to try / out of stock - the BS are 450mm -RTF will have the brushless kit for the BS for sale in APRIL for 130 bucks (complete kit) US flag = VIC
Back to top Go down
sjflyer1

sjflyer1


Exceed RC - Blazing Star Empty
PostSubject: BS probs   Exceed RC - Blazing Star I_icon_minitimeSun Mar 29, 2009 12:09 pm

Hi ,
Got about 1 1/2 batts thru my BS. First noticable problem. no matter how trims were set, next lift would be totally different. Just when I think I'm close, but next lift and she'd be all over the place. Now this next prob(before it got worse) may have been the cause of the first, except now BS is unflyable. Turn on Tx, plug in batt, initializes and the rear servo jams straight up and chatters, only way to stop is to pull trim all the way down. Thanks SJflyer
Back to top Go down
sjflyer1

sjflyer1


Exceed RC - Blazing Star Empty
PostSubject: Re: Exceed RC - Blazing Star   Exceed RC - Blazing Star I_icon_minitimeSun Mar 29, 2009 12:29 pm

Just tried again, servo up and chattering, swashplate as far over as it'll go, then click click, servo centered, swashplate level. Powered up, she lifted straight up, hovered 1-2 ft of ground, 20-30 seconds, no hands, trimmed as good as it gets, THEN WHAM! servo does it's thing, BS drops to ground skittering sideways across floor.
Back to top Go down
Donnie D

Donnie D


Exceed RC - Blazing Star Empty
PostSubject: Re: Exceed RC - Blazing Star   Exceed RC - Blazing Star I_icon_minitimeSun Mar 29, 2009 2:59 pm

I've never owned a Blazing Star but try removing and reseating both the transmitter and receiver crystals. think004 Also when you do, try giving the pins on the crystals a tiny bit of bend so they will seat tighter when you replace them. Worth a try. I've had to do this with my Belt CP a couple of times. smiley-happy088

Donnie D
Back to top Go down
sjflyer1

sjflyer1


Exceed RC - Blazing Star Empty
PostSubject: Re: Exceed RC - Blazing Star   Exceed RC - Blazing Star I_icon_minitimeMon Mar 30, 2009 12:10 am

Thanks for the suggestion. As it turns out, now that I had more time to mess with it, the elev. servo is bad. When I reverse the servos, the elev servo has spasms in either it's own plug in or plugged into ailr side, which should eliminate Tx, Rx or crystals as the prob....
Back to top Go down
Nuttcaze
Admin
Nuttcaze


Exceed RC - Blazing Star Empty
PostSubject: Re: Exceed RC - Blazing Star   Exceed RC - Blazing Star I_icon_minitimeMon Mar 30, 2009 3:22 am

I had a servo go bad on my old HBFP that did the same thing
Back to top Go down
RTF-HELI


Exceed RC - Blazing Star Empty
PostSubject: RE: Twin Brushless motor Kit for the Exceed Blazing Star/ Walkera HM 53#1 ...   Exceed RC - Blazing Star I_icon_minitimeWed Apr 08, 2009 8:04 am

A twin brushless kit is now available for the Exceed Blazing Star/Walkera HM 53, 53#1, and 53#8. Goto: http://www.rtf-heli.com for more info and pricing.

Old Carbon Brushed System.
Exceed RC - Blazing Star Oldbla10

New Twin Brushless System. Click on Image below.
Exceed RC - Blazing Star Newbs10


rofl
Back to top Go down
Sponsored content


Exceed RC - Blazing Star Empty
PostSubject: Re: Exceed RC - Blazing Star   Exceed RC - Blazing Star I_icon_minitime

Back to top Go down
 
Exceed RC - Blazing Star
Back to top 
Page 1 of 1
 Similar topics
-
» My first heli.....Exceed Blazing Star
» BRUSHLESS
» BLAZING STAR and MY RACE CAR
» BLAZING STAR TAIL SPIN
» Exceed RC Falcon 40

Permissions in this forum:You cannot reply to topics in this forum
RC Guides Forums :: RC Helicopters :: 4ch FP and Co-Axial Helicopters-
Jump to: